I have had a torrid time merging differencing disks (AVHD/AVHDX) to the original boot HyperV machine problem. These files occupy most of the space on the host machine causing all the virtual machines running on the host to go into a pause state.
It is imperative to take a backup of the virtual machine concerned before running the merge process. The steps provided below do not guarantee a successful merge of the AVHD/X to the VHD/X.
Please find below steps to resolve the problem at hand:
- Select Hyper-V server in Hyper-V Manager
- On left-hand side, select Inspect Disk
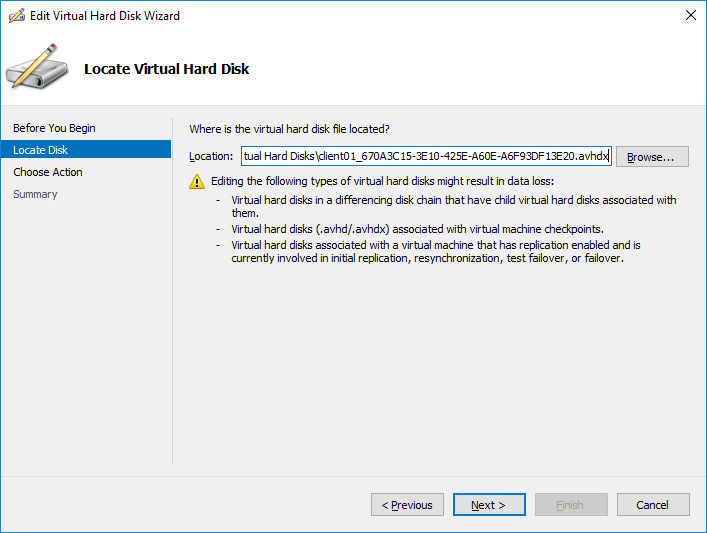
- Browse to location of restored AVHD/AVHDX files
- Select one of the AVHD/AVHDX files > OK
- Record parent disk name
- Repeat steps 2-5 for each AVHD/AVHDX file, and record their order (from newest to oldest)
- Note: do not use timestamps to determine which files to merge, as this could lead to overwriting the incorrect parent file
- Select Hyper-V server in Hyper-V Manager
- On left-hand side, select Edit Disk
- Next > Select newest AVHD/AVHDX file
- Followed by Next > Select Merge
- Next > To the parent virtual hard disk
- Finish
- Repeat steps 7-12 for each AVHD/AVHDX disk, until only the VHD/VHDX disk is left for the machine
- Mount VHD/VHDX in new virtual machine in Hyper-V and boot
In order to merge the files using PowerShell, you can use the below steps:
- Open PowerShell and run command to navigate to directory where AVHDX and VHDX files are located:
- Note: if files are on different disk than C:, first change to correct disk with disk letter in PowerShell prompt:
- <disk letter>:
- For example, if data is located on drive D:, command would be:
- D:
- To change to correct directory:
- cd <directory path where files are located>
- Note: if files are on different disk than C:, first change to correct disk with disk letter in PowerShell prompt:
- Run following command on each AVHDX file:
- Get-VHD .\<name of AVHDX file>.avhdx
- Note name of parent AVHDX file from ParentPath entry in output
- Repeat steps 2 and 3 until you have a list of all AVHDX files with their respective parent AVHDX files
- Beginning from newest AVHDX file (only AVHDX file with no child file), run following command:
- Merge-VHD -Path ‘<path to AVHDX>’ -DestinationPath ‘<path to parent AVHDX’
- Repeat step 5 on each AVHDX, always starting with newest available file
- Once all AVHDX files are consolidated, merge last AVHDX with main VHDX file:
- Merge-VHD -Path ‘<path to AVHDX>’ -DestinationPath ‘<path to main VHDX disk’
As far as I am aware, the internet calls this a manual method to merge the AVHD/X into VHD/X. Feel free to drop a comment in the comment section below. Thank you 🙂


It抯 really a great and helpful piece of information. I am happy that you simply shared this useful info with us. Please stay us informed like this. Thanks for sharing.
Thank you very much. Indeed I shall keep more articles rolling with time. Take care 🙂
Thanks for the sensible critique. Me and my neighbor were just preparing to do some research on this. We got a grab a book from our area library but I think I learned more clear from this post. I’m very glad to see such magnificent information being shared freely out there.
Most welcome.